
Once our computer is assembled, it is quite normal to forget about its specifications. It is also not necessary to memorize all the components that our computer has, since we can find out whenever we want. There are different methods or tricks to know which is the processor of our computer without having to remove a single screw, we simply have to ask Windows.
Always remembering all the specifications of your equipment does not make much sense. Furthermore, if you use a laptop, you may not know extremely precisely what components it uses. But it is not necessary either, since you can recover this data in a few moments.
There are different methods to recover this information at any time. They are not particularly complicated, in fact, they are just a few clicks away. If you thought that the only option you had was to dismantle the entire system, that’s not the case. We will see how these processes work for both Windows 10 and Windows 11.
Know the hardware from Windows settings
Let’s start with a fairly simple one that requires very few steps to obtain the information. You just have to follow the following process:
- We click on the Windows icon.
- Now click on the “Settings” gear wheel.
- Once inside we must enter the “System” option.
- We look in the left column for the “About” option and enter.
- Here our processor and other important system data will appear.
We can reach this window from another place, specifically, through the “File Explorer”. We simply have to open any folder we have on our computer. We must right click on “This computer” that appears in the left column. Now, we have to access “Properties” and voila, we will see the same window as with the previous method, but accessing it from another point.
View CPU from Task Manager
This feature built into Windows has always been quite useful, but in the latest versions of the operating system it has improved a lot. Currently, it not only allows us to interrupt processes, it also allows us to see the system resource consumption. It should be noted that, recently, Microsoft saw fit to add the graphics card information, something that has been requested by users for two decades.
To know what our processor is from here, we will simply follow these steps:
- We right click on the Windows bar at the bottom of our screen.
- We will look in the drop-down menu for the “Task Manager” option, which should be the third from the bottom.
- The “Task Manager” opens in the “Processes” tab
- We have to proceed to search and click on the “Performance” tab
- Here we will see the name of the processor
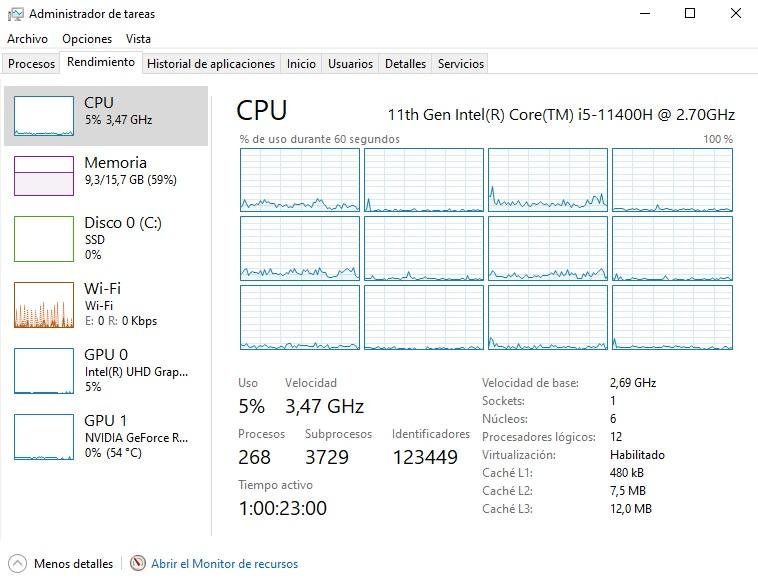
It not only shows us the processor data, but also its use, number of cores and threads, frequency, cache and other data that may interest us. We can also see the data of the RAM memory, storage unit, network card and graphics card.
Discover the processor using DirectX
We have another option to see our system processor and other relevant data on our equipment. This is less known, but also quite interesting, providing a lot of information. To access dxdiag of DirectXwe must follow these steps:
- We enter the text “dxdiag” in the search engine.
- We click on the option that appears.
- A fairly simple window will open, but complete with information.
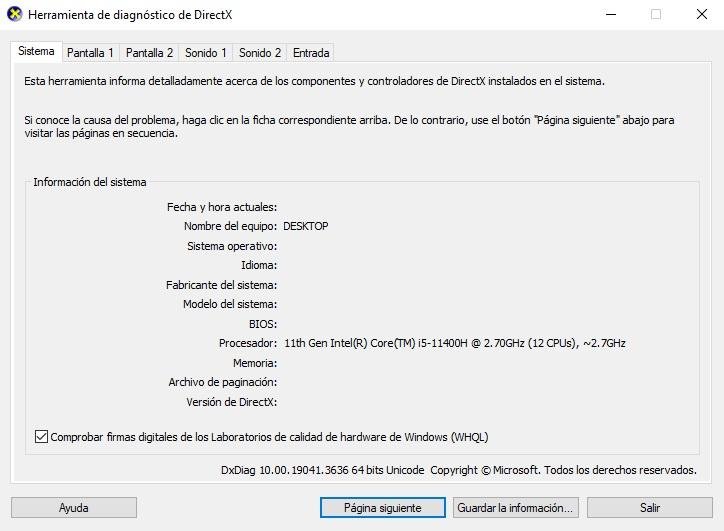
The system tab gives us the name of the processor and other relevant data. The rest of the tabs detail the graphics card, sound card and peripherals connected to the system.